
Transform Your iPhone Into A Professional Photography Tool In Just 7 Days
How To Capture Stunning, Aesthetic Photos That Get Hundreds of Likes And Make People Say "Wait, You Shot This On An IPHONE?!" In Just One Week
(even if you're stuck with the default camera app and have no idea what RAW or editing even means)

The Simple System That's Transforming Blurry, Over-Processed iPhone Photos Into Film-Quality Images That People Actually Stop Scrolling For
"I've been trying everything to get that film look everyone's getting, but my photos just look like...phone photos. Generic. Overprocessed. Nothing special."

I still remember the feeling of posting my iPhone photos and getting maybe 12 likes while watching other people's shots blow up with hundreds of comments asking "what camera is this?!"
The worst part? They were using the same iPhone I had.
I'd spend 20 minutes trying to get "the shot" only to watch my phone's AI processing destroy all the atmosphere I was trying to capture. Everything looked artificially sharpened, colors were weirdly saturated, and that "phone photo" look was impossible to escape.
Now my daily struggle with iPhone photography included:
Photos that looked nothing like what I saw with my own eyes - the iPhone's processing killed all the mood and atmosphere
Watching everyone else nail that vintage, film-inspired aesthetic while my shots looked like they came straight from a 2015 Instagram filter
Having no clue why some photos "worked" and others didn't - it felt completely random whether I'd get something worth posting
Spending hours editing in apps only to make things worse with each adjustment until I just gave up and posted the unedited version
Feeling embarrassed to call myself a "photographer" when all I had was an iPhone and everyone in the r/iPhoneography comments was talking about RAW files, Halide, and LUTs I'd never heard of
The Failed Solutions That Kept Me Stuck
I tried everything the top photographers and YouTube tutorials suggested:
Downloaded every "pro" camera app (but had no idea which settings to actually use, so I just went back to the default camera)
Bought Lightroom mobile subscriptions (spent $120/year only to feel overwhelmed by all the sliders and presets that never looked quite right)
Watched 47 different "iPhone photography tutorials" (each one contradicted the last, and I still couldn't figure out why my photos looked so processed)
Tried shooting in "ProRAW" mode (had no clue what to do with the files afterward and they took up all my storage)
Bought preset packs and LUT collections (couldn't figure out how to install them, and when I finally did, they looked terrible on my photos)
I felt like everyone else had figured out some secret system that I just wasn't cool enough to know about.
Then I Discovered Something That Changed Everything...
After my photo of a street lamp got absolutely roasted in the comments for being "overblown and out of focus," I decided to actually figure out what the photographers getting thousands of upvotes were doing differently.
I spent three months lurking in iPhone photography communities, analyzing every "shot on iPhone" post that went viral, and reverse-engineering the exact workflow of photographers who consistently captured that aesthetic, film-inspired look.
What I learned shocked me:
According to camera app developers and professional mobile photographers, over 80% of what makes an iPhone photo "aesthetic" happens BEFORE you even press the shutter button:
The default iPhone camera app is actively working against you - its AI processing destroys grain, atmosphere, and that organic film look people love
Most "professional" photographers use the same 3-4 simple techniques - not fancy gear or complex editing, just knowing which settings to change before shooting
That "film aesthetic" everyone's chasing has nothing to do with presets - it's about understanding how to capture and preserve natural light, grain, and mood
The editing process can be done in under 2 minutes per photo once you understand the exact order of adjustments (not random slider moving)
But most alarming of all:
Most iPhone users are unknowingly making their photos look MORE processed by relying on the default settings and over-editing in post.
I know because I was making all these same mistakes...
Through extensive research and consultation with:
Professional mobile photographers with millions of combined likes on their iPhone work
Camera app developers who built tools specifically to fight iPhone's over-processing
Film photographers who transitioned to iPhone and maintained their aesthetic
I discovered WHY my photos looked so "phone-y" - and more importantly, what actually works to get that coveted aesthetic look.
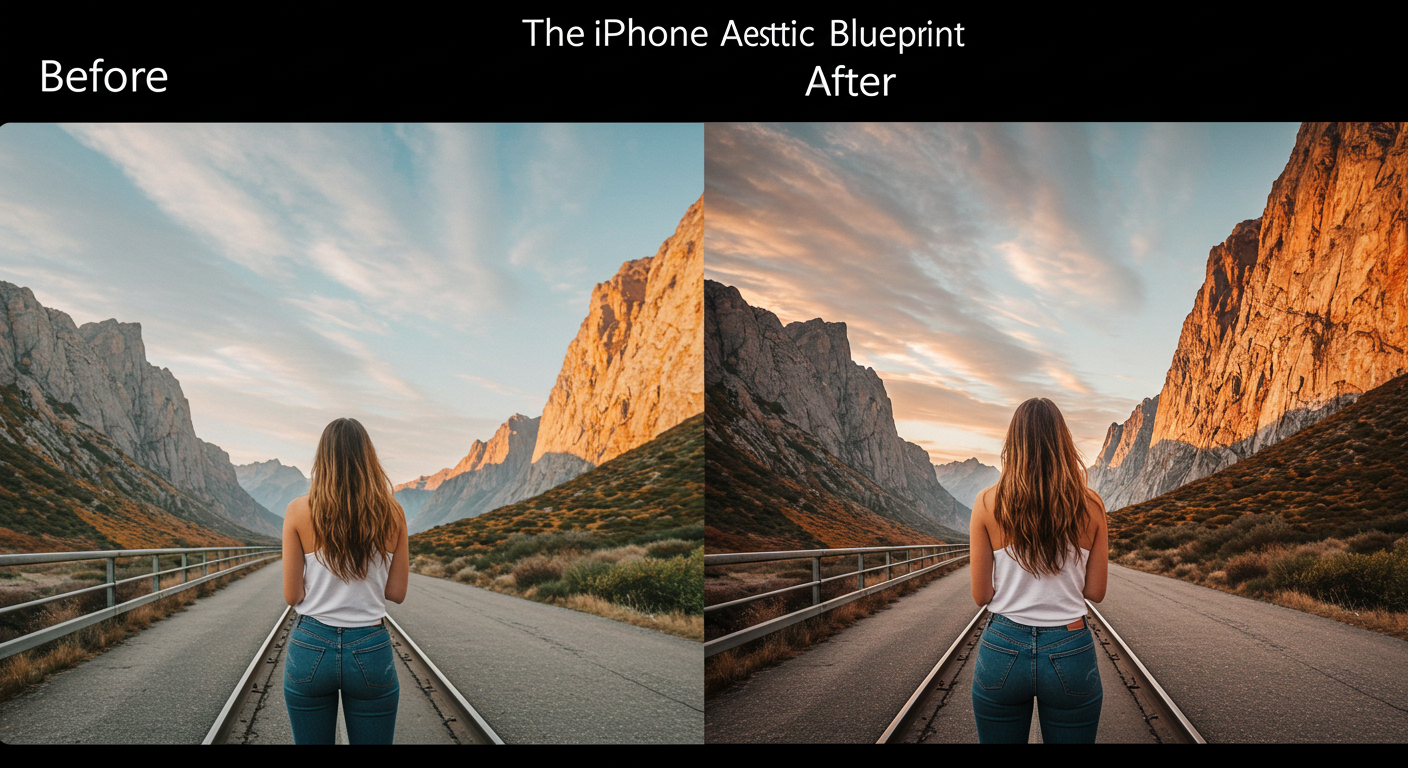
I call it the "iPhone Aesthetic Blueprint"
By understanding the exact settings, apps, and 3-step editing workflow that preserves natural grain and atmosphere, I was able to:
Shoot photos that people assumed were taken on a $2,000+ camera (not my iPhone 15)
Get my first 500+ like post within 2 weeks of implementing the system
Edit an entire photo session in under 15 minutes instead of spending hours tweaking and second-guessing
Finally understand what RAW means and why it matters (and how to use it without filling up my storage)
Develop my own recognizable style instead of copying whatever preset was trending that week
After helping 300+ other iPhone users replicate these results, I've refined this system into a step-by-step method that anyone can use…
...even if you're still using the default camera app and have never edited a photo before.
THE 5 ESSENTIAL SKILLS THAT SEPARATE "AESTHETIC" PHOTOS FROM GENERIC "PHONE PICS"
The 4 Core Abilities Every iPhone Photographer Needs (That The Default Camera App Doesn't Teach You)
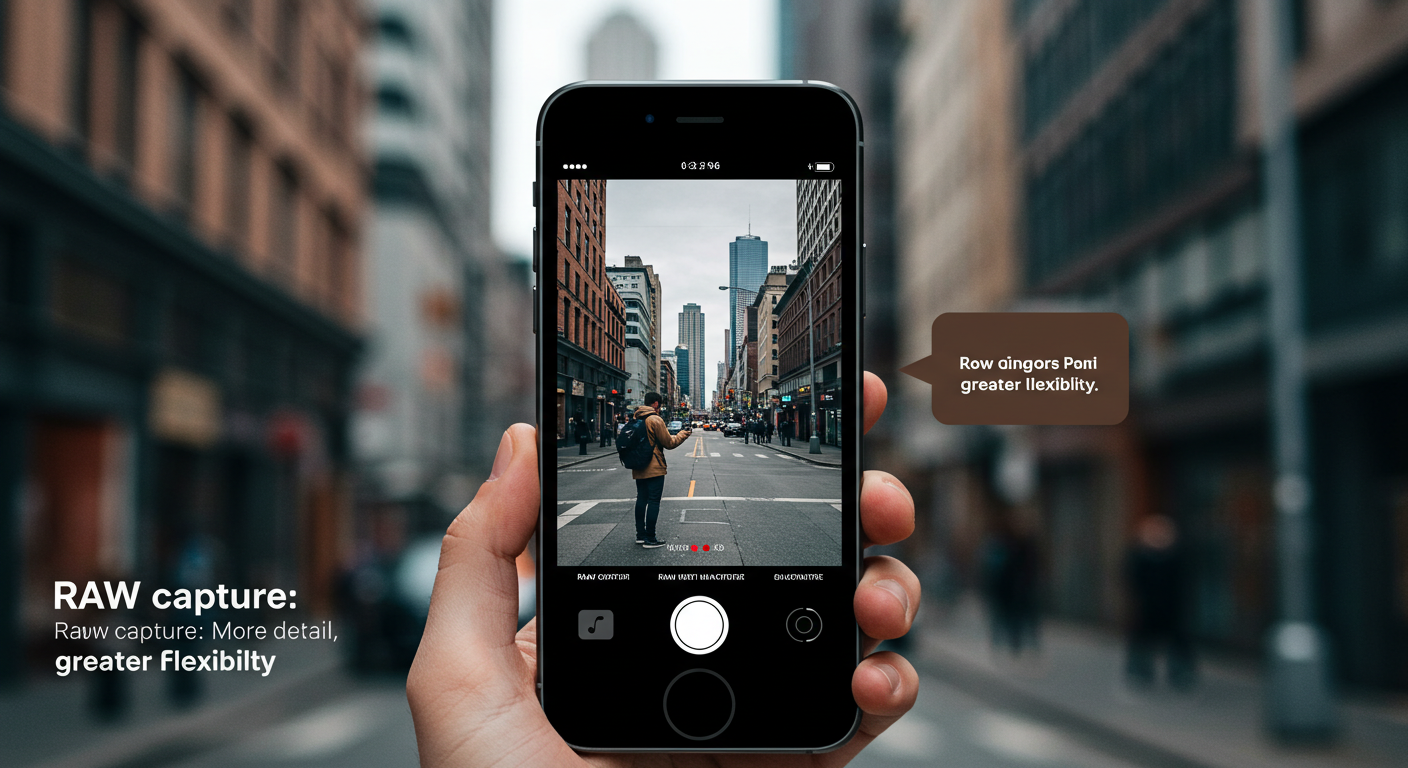
1. RAW Capture Mastery: Understanding how to shoot in RAW without technical overwhelm - this gives you actual control over your image instead of letting AI make decisions for you (and without RAW, you're stuck with the overprocessed look that screams "phone photo")
2. Light Recognition: Knowing which lighting situations will create "wow" photos versus flat, boring ones - this means you stop wasting time shooting in conditions that will never look good no matter how much you edit (and without this, you'll keep getting frustrated wondering why your shots don't have that "mood")
3. The 2-Minute Edit Formula: Following the exact sequence of adjustments that creates the film aesthetic without making photos look over-edited - this replaces hours of random slider-moving with a repeatable system (and without a clear process, you'll keep over-editing until your photos look worse than when you started)
4. Grain & Texture Preservation: Understanding how to keep the natural, organic texture that makes photos feel authentic instead of artificially smooth - this is what separates aesthetic shots from the plastic, over-sharpened look most iPhone photos have (and without this knowledge, your photos will always look too "digital")
INSTANT ACCESS - START SHOOTING AESTHETIC PHOTOS TODAY
Here's Everything You Get With The iPhone Aesthetic Blueprint Today!
What's included:
The Complete iPhone Aesthetic Blueprint: 7 proven modules that transform your iPhone camera into a professional tool and teach you the exact system for capturing + editing photos that get hundreds of likes
🎁 Plus These 5 Game-Changing Bonuses 🎁
"The Ultimate iPhone Camera App Comparison Guide" - Stop wasting money on subscriptions you don't need. This guide breaks down exactly which apps are worth it (and which are just expensive filters). Includes my personal app stack that costs under $60 total - no subscriptions required.
The LUT Installation Masterclass" - Finally understand how to find, download, and actually install LUTs on your iPhone. Includes my curated collection of 10 film-inspired LUTs that work on any iPhone photo, plus the exact apps that support them (no tech experience needed).
"The Instagram-Ready Export Settings Cheat Sheet" - Your photos look amazing on your phone but terrible after Instagram compresses them? This guide shows you the exact export settings that preserve quality so your photos look just as good in-feed as they do in your camera roll.
"30 Film Photography Composition Templates" - Never wonder "what should I shoot?" again. These visual templates show you exactly how to frame common subjects (coffee shops, street scenes, portraits, nature) to get that aesthetic film look every single time.
"The RAW Storage Solution" - Shoot in RAW without filling up your entire phone in 3 days. This guide reveals the exact workflow for managing RAW files, including which ones to keep vs. delete and how to archive your best work without paying for expensive cloud storage.
Normally:$125
Today: $15
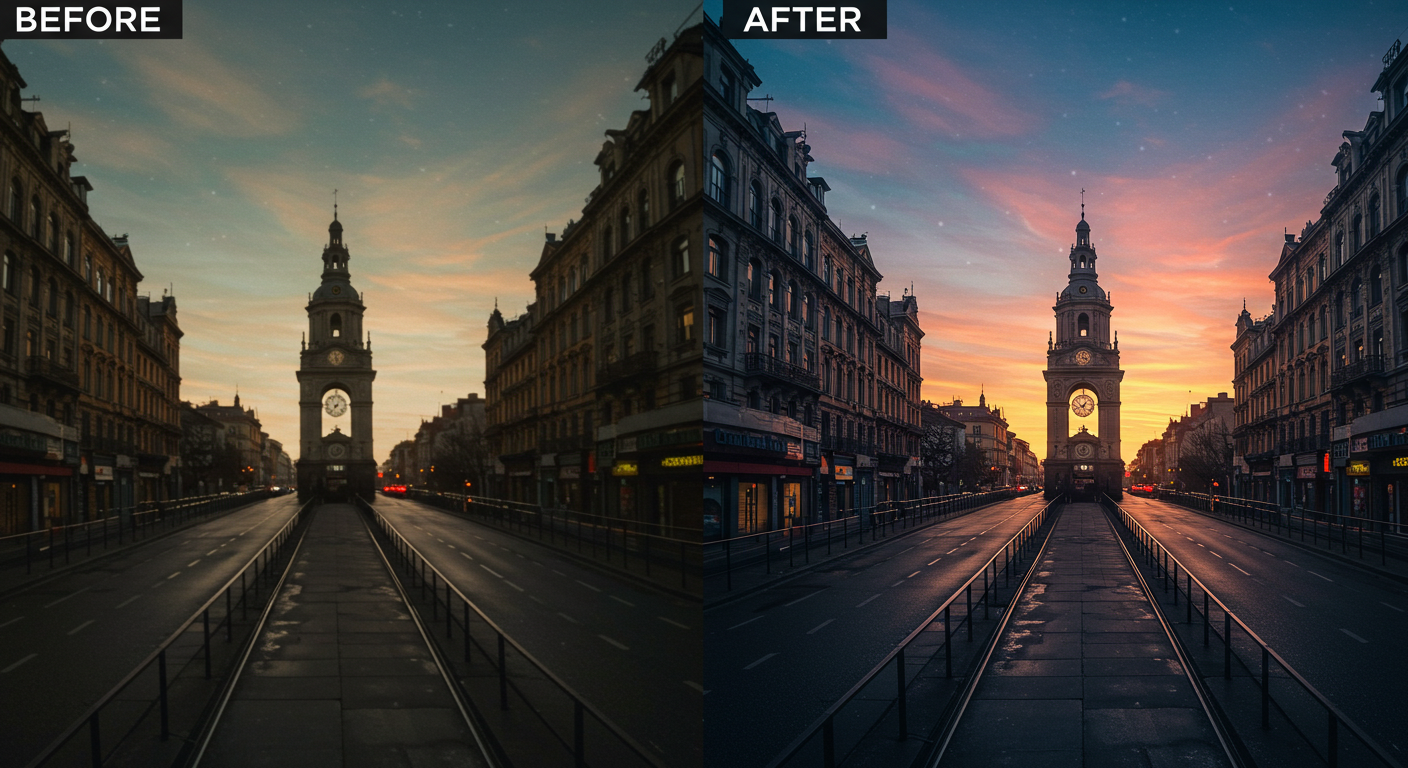
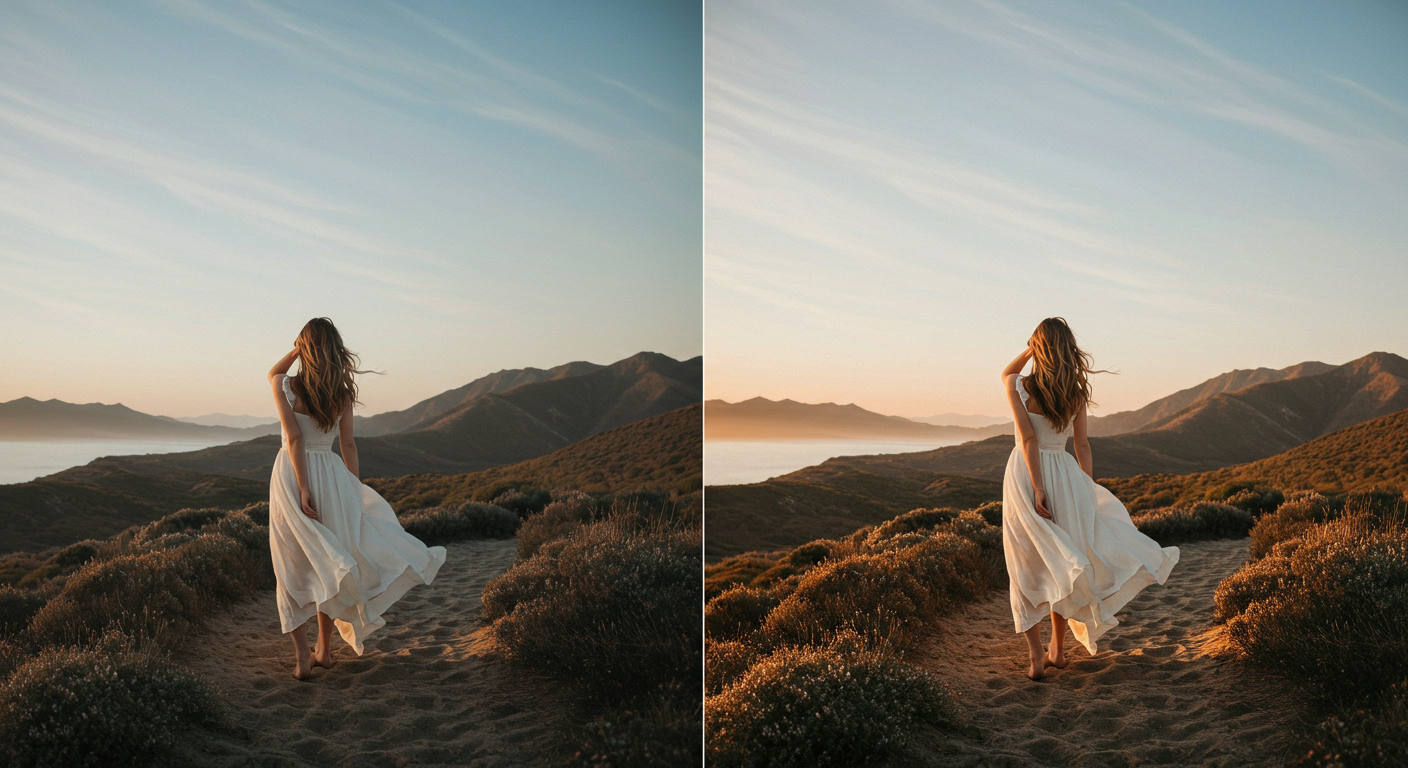
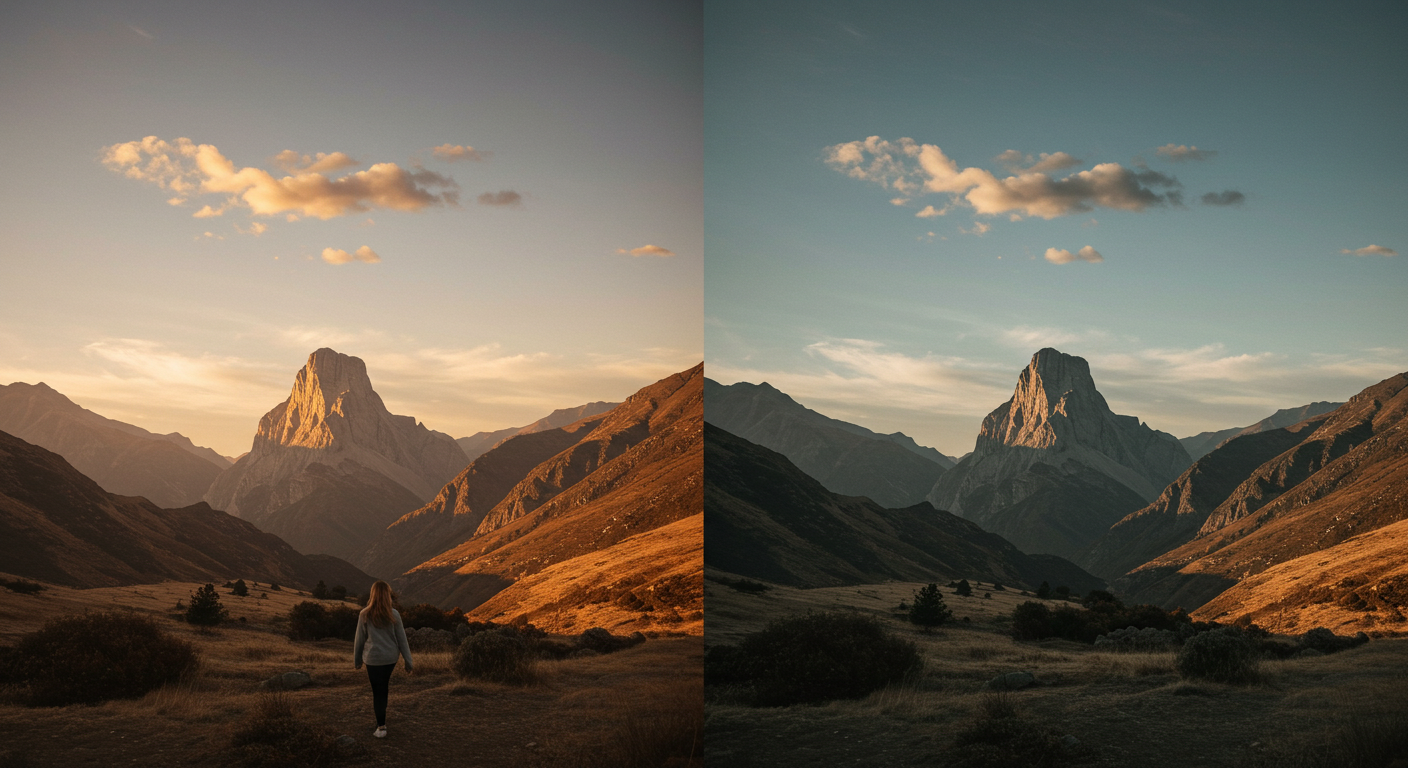
BEFORE AND AFTER
Photos that looked "AI processed" and fake - too sharp, colors too saturated, obviously taken on a phone
Spending 30+ minutes editing a single photo only to make it look worse with each adjustment
Feeling embarrassed to post your photos next to people who were getting hundreds of likes on their iPhone shots
No consistent style or aesthetic - every photo looked completely different and you couldn't figure out why some worked and others didn't
Watching tutorials that left you more confused about RAW files, Halide settings, and which apps were actually worth downloading
Wasting money on camera app subscriptions you didn't understand how to use ($12/month for apps you opened twice)
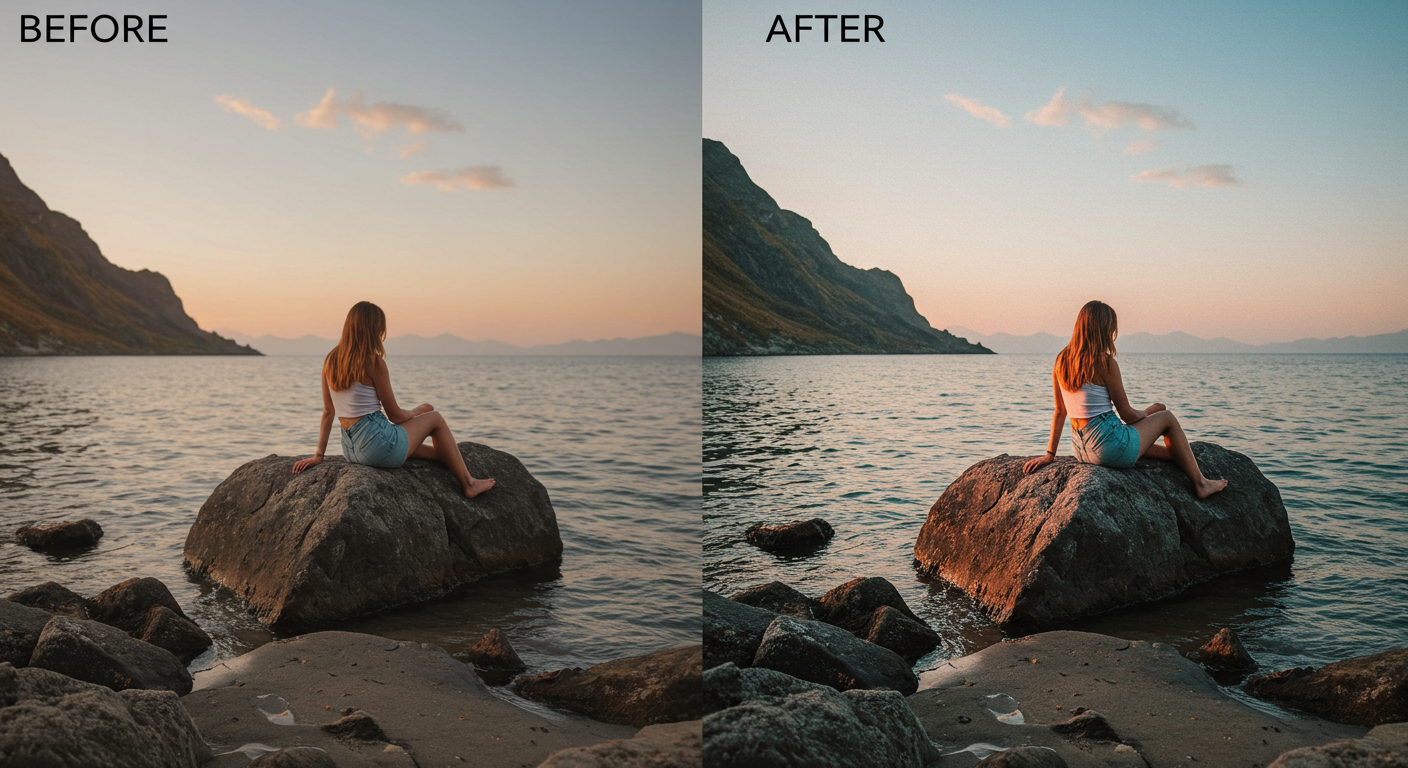
Photos that make people comment "wait, this is iPhone?!" - capturing that film-inspired, organic aesthetic everyone loves
Editing complete photo sessions in under 15 minutes using the proven 2-minute-per-photo formula
Posting with confidence knowing your photos have that professional look that actually stands out in the feed
Your own recognizable style that people notice across all your photos - not just copying whatever's trending
Complete clarity on exactly which apps to use and why - no more downloading everything and being overwhelmed
Actually enjoying iPhone photography instead of feeling frustrated every time you try to capture a good shot